DIY Carnaval Mask

DIY carnaval mask (2)DIY carnaval mask (3)What you’ll need
Mask
Hot glue gun
Appliqués
Felt
Feather trim
Pencil
Glitter
Elmer’s glue
Flat paint brush

DIY carnaval mask (4)1 Take mask and remove unwanted embellishments. You can also find a plain mask.
2 Using the felt hold it up against the mask and mark the width with a pencil. Then create a semi circle to the height which you’ll like the feathers to sit. Fold in half and cut to create symmetry.
3 A-Take your ribbon of feathers and place it up again the top edge of the felt. Ribbon and bottom  2″ of feathers  should sit up against the felt. Mark and cut excess off.
B-If you’re using a loose bag of feathers line the 1st layer of feathers on the top edge of the felt. 2″ from the bottom of the feathers should sit on top of the felt.DIY carnaval mask (5)4 A-Using glue gun apply hot glue to the ribbon and place into top edge of felt.
B-Pick up each individual feather one at a time and apply hot glue.
5 Create 2nd row of feathers:
A-Take feather trim and place above 1st layer. 2nd row of feathers should overlap and cover about 2″ of the 1st layer. Mark and trim away accesses.
B-Take your individual feathers and overlap about 2″ of the 1st layer.
6 Glue down with hot glue gun. Same as step 4.
7 Last low of feathers: I like to use individual feathers to prevent bulkiness. If the feather’s quill  is too long, you can trim before gluing onto bottom edge.DIY carnaval mask (6)8 Back side of felt. Take trim of feathers or loose feathers and place right up again the top edge of felt. Top of feather should overlap felt about 1/2-1″ I also prefer to use loose feathers to prevent bulk.
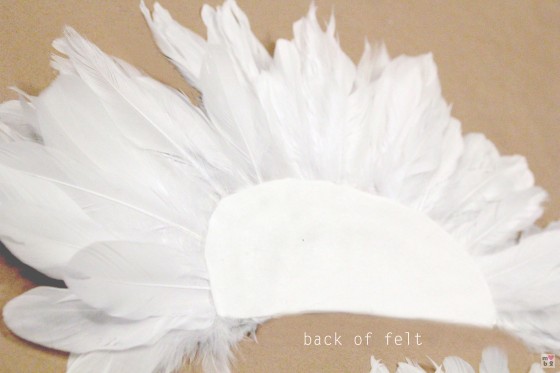
9 Once the back side is all covered with feathers, it’s time to glue your masterpiece to the mask itself!
Squeeze a line of hot glue about 3/4″ height across the top edge of the mask. Quickly take front side of feathered piece and place bottom edge right above 3/4″ glue strip.
10 Almost done… Here comes the fun part.Time to decorate the mask itself.Take your appliques and play with the placement before using glue gun to tack down the position. 11 Apply Elmer’s glue to the whole mask using a brush. Pour glitter over mask until covered. Let dry for a couple of hours until set and Presto! You’re ready for to host your own Carnaval party.DIY carnaval mask

Los Carnavales

carnival (2)One thing on my check list is to check out Carnival. Joe and I drove down to DC 2 years ago, some how we missed the West Indian parade. Maybe it was a blessing in disguise, turns out there was a shooting that went on. Yikes! But the after party was just as exciting.

One of the biggest and most festive Carnival in the world was just celebrated in Colombia; Carnaval de Barranquilla. Upbeat music and dancing filled the streets of this industrial port city north of Columbia. The high energy festivities lasted 4 days showcasing decorative costumes and headpieces covered in vibrant feathers, beads and all things shiny.

Even though I couldn’t make it to the lively streets of Barranquilla, doesn’t mean I have to miss it completely. Libation down in LES will be dedicating this Friday to the fun festivities with a New York twist featuring Que Bajo. I love nothing more then the excuse to dress up! My head piece is ready to go. Saúde, to the fun things in life!carnival (4)carnival (3)carnival

Snake Charms

photo(11)We slithered our way through the crowd on Mott street to get to the center of the gem. There was a shower of bright Confetti and streamers gliding across the clear blue sky. The beats of the drum and the cymbals got louder as we approached the festivity. Step by step the heavily decorated lion dancers show off their martial art moves as they blessed each business in exchange of a lucky red envelope. This year I was fortunate to have a lucky parachute effortlessly land into my hand while we were following the parade. The parachute came from a confetti shooter which took the place of the traditional firecrackers. Usually you’ll see a crowd surrounding it for the chance to snag the prize. What a great way to start off the New Year!photo(12)photo(10)photo(7)photo(8)photo(9)

Lunar Celebration

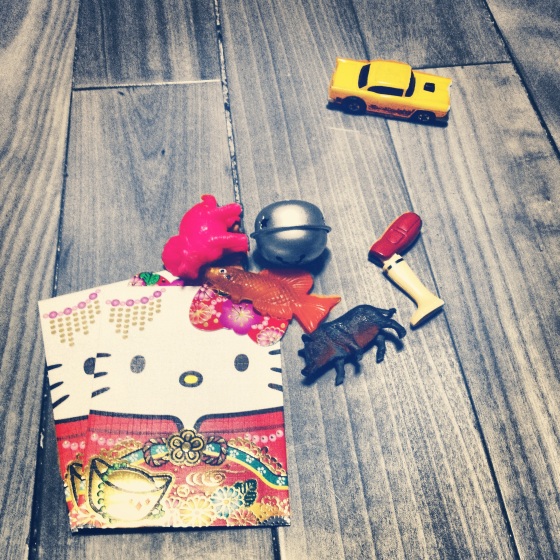
cny (2)Gung Hay Fat Choy! Excited for the weekend to come. Sunday, February 10th marks the Lunar New Year. In celebration of the snake year there are many traditions each family follows. Positive thoughts, and random acts of kindness are some of the best practices to kick off a great year. I’ll be jazzing up my mani/ pedi with some red glittery polish. Shades of Red symbolizing fortune and luck. Blooming flowers represent rebirth, growth and love. Gold coins/ rings represent good wealth and longevity. To celebrate the occasion I put together some fun juxtapositions of the adorable “red” envelopes I recently purchased for the kids. I want to take this time to wish each one of you success, happiness and good health for the new year. Thanks so much for taking the time to visit.cny8cnycny (4)cny (3)

The Overall Trend in 2013 Year of Snake
“The 2013 Snake of year has ability to read complicated situation quickly in a controlled manner which is good for business. Signing documents of any kind requires very thorough attention. 2013 horoscope predict it is a good year to begin important detail work. Research and investigation are supported. The Snake has sneaky energy that can be to your advantage. Look for the holes in the loop. A new-found ambition to greatness will inspire you to be all you can be, and provide you with the follow through to actually achieve your goals, And, 2013 year of the Snake also supports added responsibility,
But 2013 Snake need to watch for fanatical commitments since Snakes inclination to spend money quickly than earn them may produce tensions in personal relationships. Create a safe space to work from this 2013 year. The Snake likes protection, needs to feel safe and secure to utilize its special analytical skills. This is the year to make headway in slow and methodical ways. Things will definitely be accomplished as you focus forward.”

Confetti System

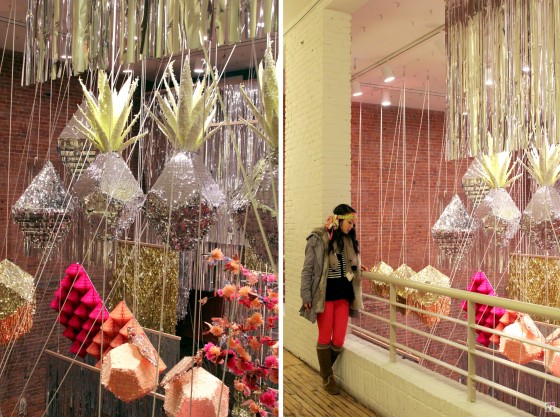
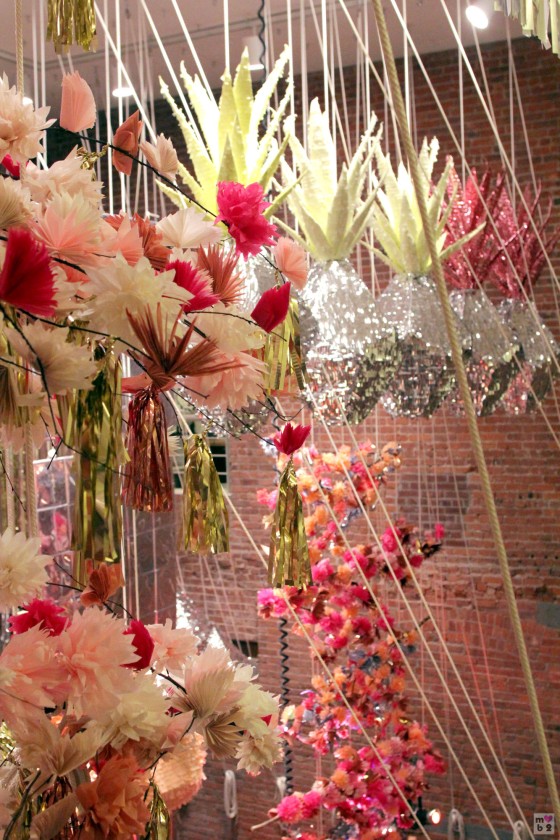
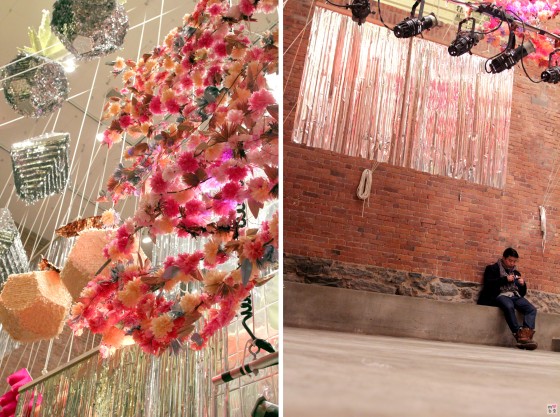
confetti system (2)After visiting Confetti System’s Installation at MoMA PS1, in Long Island City, my mood was altered so quickly from a dull rainy day to a bright cheerful awakening. Hello! The vibrant & festive display of beautifully hand cut fringed pinatas, metallic Mylar tassels & tissue paper cherry blossoms were all so inviting. It was a jolt of sheer excitement. The spunky Duo, Julie Ho and Nicholas Andersen are magnificent crafters. I would love to invite them over for a craft party. I just can’t get enough… I want MORE!confetti system (4)confetti system (5)confetti systemconfetti system (3)

Sleeping Mask

cat mask7-8 hours of sleep sounds mighty good to me. But I always find it difficult to crawl into bed early enough to fulfill those hours. Especially when my mind is churning so quickly with new ideas for my next project.

This sleeping mask will be a good reminder to work 24 hours a week 7 days a month and take frequent cat naps. My new creations was made for the recent slumber party with my girlfriend. If you’re ready for a challenge here’s the step by step instructions below.cat mask1

Supplies needed:
Poplin- 1/4 yd multi print stacks from Purl Patchwork
Silk- 1/2 yd lining fabric from Mood Fabrics
Quilt batting- 1/4 yd from Daytona Trims
1 yard of flat metallic soutache

Metallic lamé
Framed glasses
Pencil
Ruler
Scissor
Satin pins
Iron
Fusible
Magna tac
Safety pin
Needle and thread
Sewing machinecat mask patterns

1 Create a pattern

A- Create pattern for the front. Trace around frame of glasses for your guideline of the width and the length of mask. Fold paper in half, around the arch of the nose. Sketch 1/2 of the mask. Then transfer to other side with a light-box or against a lite window. Add 1/4″ seam allowance around edge of pattern. If you understand pattern making you can create different sections for contrasting fabrics to create a patch work look.

B- Create lining pattern. If your front pattern is just one piece you do not need to recreate another pattern. If not, create one pattern then add 1/4″ seam allowance around edges.

C- Create separate pattern for the interfacing; quilt batting. This is essentially the same as the lining but without seam allowance.

D- Create a pattern for eyelash and ears,no seam allowance necessary.
E- Lable all pattern pieces so you know what you’re working with and how many you’ll need to cut with each specific fabric.
2 Tada …were done! j/k
We’re at lease done with the patterns.cat mask the making

2 Choose fabrics. Poplin for the front and silk for the lining. If you’re going with the challenging patchwork look choose two contrasting fabrics that will sit well together. If not, one will be just fine.

3 Take poplin, lining & lamé fabric and iron on fusible to the back of the fabrics. Use a scrap piece of fabric between iron and fusible to prevent adhesive from melting onto iron. Fused fabric will give your fabric more body, control and stability. (Note: Adhesive on fusible is the rough side of the fabric. Which should iron on to the back side of the fabrics.)

4 Place patterns on fabric. Pin and cut out.

A- Floral printed fabric for front of mask.

B- Silk for lining, so it’ll be smooth when mask is against your face.
C- Lamé for eyelashes and ears.
5 Use Magna Tac and glue eye lashes on to pattern.
6 If your front printed mask has multiple patterns, piece them together either by hand stitch or by machine and iron the seams flat.
7 Place cut pattern of polyfill onto back side of the patterned poplin fabric. Center the polyfill leaving the seam allowance of the patterned fabric exposed.

8 Pin polyfill in place.

9 Pencil in a couple of  lines on the polyfill. These lines will be hand stitched. Using a blind stitch technique. This will hold the polyfill in place. If you have seams from the front of the mask.You can blind stitch in the crack of the seams.

10Take your yard of flat metallic soutache and cut in half.

11 Looking at the front of the mask. Place1/2 the soutache at both sides of the midway point (Fullness of soutache s/b in the inside of the mask.) I coiled the excess and safety pinned it in place.

12 Hand stitch the soutache in place. Stitch onto the seam allowance of the front mask.

13 Place lining and front of mask together (right sides facing each other.)

14 Sew together with sewing machine. Leave about 3″ unsewn on top of mask.

15 Flip mask inside out and hand stitch the remaining closed with the blind stitch technique.

16 Use iron and steam the mask so that the edges will look nice and crisp.

17 Use Magna Tac and glue on Lamé ears.

18 If this wasn’t enough you can decorate the ends of the soutache with gold tassels.

cat mask2

Are you still with me… if so, Congratulation! What do you think was it worth the effort? This can also be used as a blind fold for various games like pin the tail on the donkey. It can also be used for surprising your friend with a gift or leading them into a surprise party or dinner. I just love the little touches.

Bride To Be

A simple friendship , a moment of butterflies, a rush in cloud nine, and a lifetime of joy. This weekend I took part in my b/f’s wedding. Her fiancé came to pick me up the night before. I had an hour and a half before he would drop me off with the rest of the bridesmaids.

At first I thought of  decorating their wedding card with some pom poms since the pom pom makers and yarn was still out from my last project. But of course the neurotic person that I am, it wouldn’t be that simple.

I wanted to surprise her with a special something before the big day.  Something that will  make her feel extra special. Little by little the mobile came together.I decided to hang the mobile up on the front door of our hotel suite. That way the videographer, photographer, florist, hair and makeup artist can spot us easily.

Funflated

I can’t get enough of these charming over sized balloons! A nostalgic childhood favorite with a twist. Inflate a little fun in your life= funflate yourself. There’s so much  you can do with them. Decorate it and bring them to life. Brighten it up  with bold colors and  pom poms for some festivity, twist crepe steamers and let them float through the breeze like jellyfish, add raffia tassels and metallic tinsel for some delightful fun, mix media can bring interest as well, use lace and tulle for a more delicate and dreamy imagery. Balloons don’t necessarily have to be round and opaque. They can be heart shape or confetti filled and transparent. The possibilities are endless. Why not create something sparkly and wonderful?

Bonbon Balloons

Bonbon Balloons

Bonbon Balloons

Geronimo Balloons

Design Love Fest